How to deploy software to all computers of enterprise or organization (with Windows Server)
Step 1
Download the .msi (Microsoft Installer) file of Classic Menu for Office and save it in a shared network folder of Windows Server;
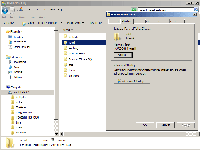
| 1. You need to create a shared network folder on your Windows Server. Please make sure everyone on the network of your enterprise or organization has the read permission to the share folder. |
 |
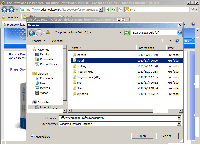
| 2. Please download the proper .msi file (according to the Classic Menu suite you purchased). And save it in the share network folder. |
 |
Step 2
Edit the MSI file with ORCA tool and enter the license name and code;
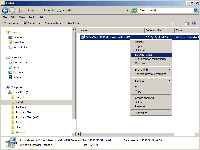
1. You could edit the MSI file with the ORCA tool. a free utility from Microsoft. What is ORCA tool, and where to download it?
Orca is part of the Windows SDK. We recommend you to download only Orca (1.8 MB) from our web site. Or you can download and install the entire Windows SDK for Windows Server and .NET Framework 3.5 iso (1.3 GB, too big!) from Microsoft. If you download the SDK, you only need to install the Win32 Developer Tools part of it. Within C:\Program Files\Microsoft SDKs\Windows\...\Bin, find Orca.msi and install it. |
 |
| 2. You could enter the license name and license code into the properties. Select Property in the Tables (on the left side). Find and change the value of the property "PROP_LICENSENAME" (on the right side) to your license name that we sent to you. Find and change the value of the property "PROP_LICENSECODE" to your license code. | 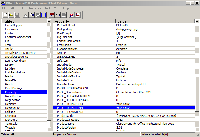 |
Step 3
Deploy the .msi file with Domain Policy Management.
More Info
Some important properties of the MSI package file
PROP_HIDEALLMENUITEM:
1: Don't show the "All" menu item in Menus tab.
0: Show the "All" menu item in Menus tab (recommended).
PROP_HIDEBUILDINTABS:
1: Hide all built-in tabs on the ribbon of Office 2007.
0: Don't hide.
PROP_SHOWATLAST:
1: Show the Menus tab on the right of Home tab.
0: Show the Menus tab on the left of Home tab (recommended).
PROP_LICENSENAME: Your license name.
PROP_LICENSECODE: Your license code.
Multiple Languages
The single installation package file includes all languages support and automatically shows the menus and toolbars in the language of Microsoft Office 2007 (or 2010) on the client computer.
Related Article
Click How to use Group Policy to remotely install software in Windows Server 2003 to learn more about the deploying Microsoft Office 2007 Enterprise or other software in enterprise or organization.
